Infrared Photography with the Hoya R72 filter
20 Dec 2015, Posted by in Blog, guide, landscapes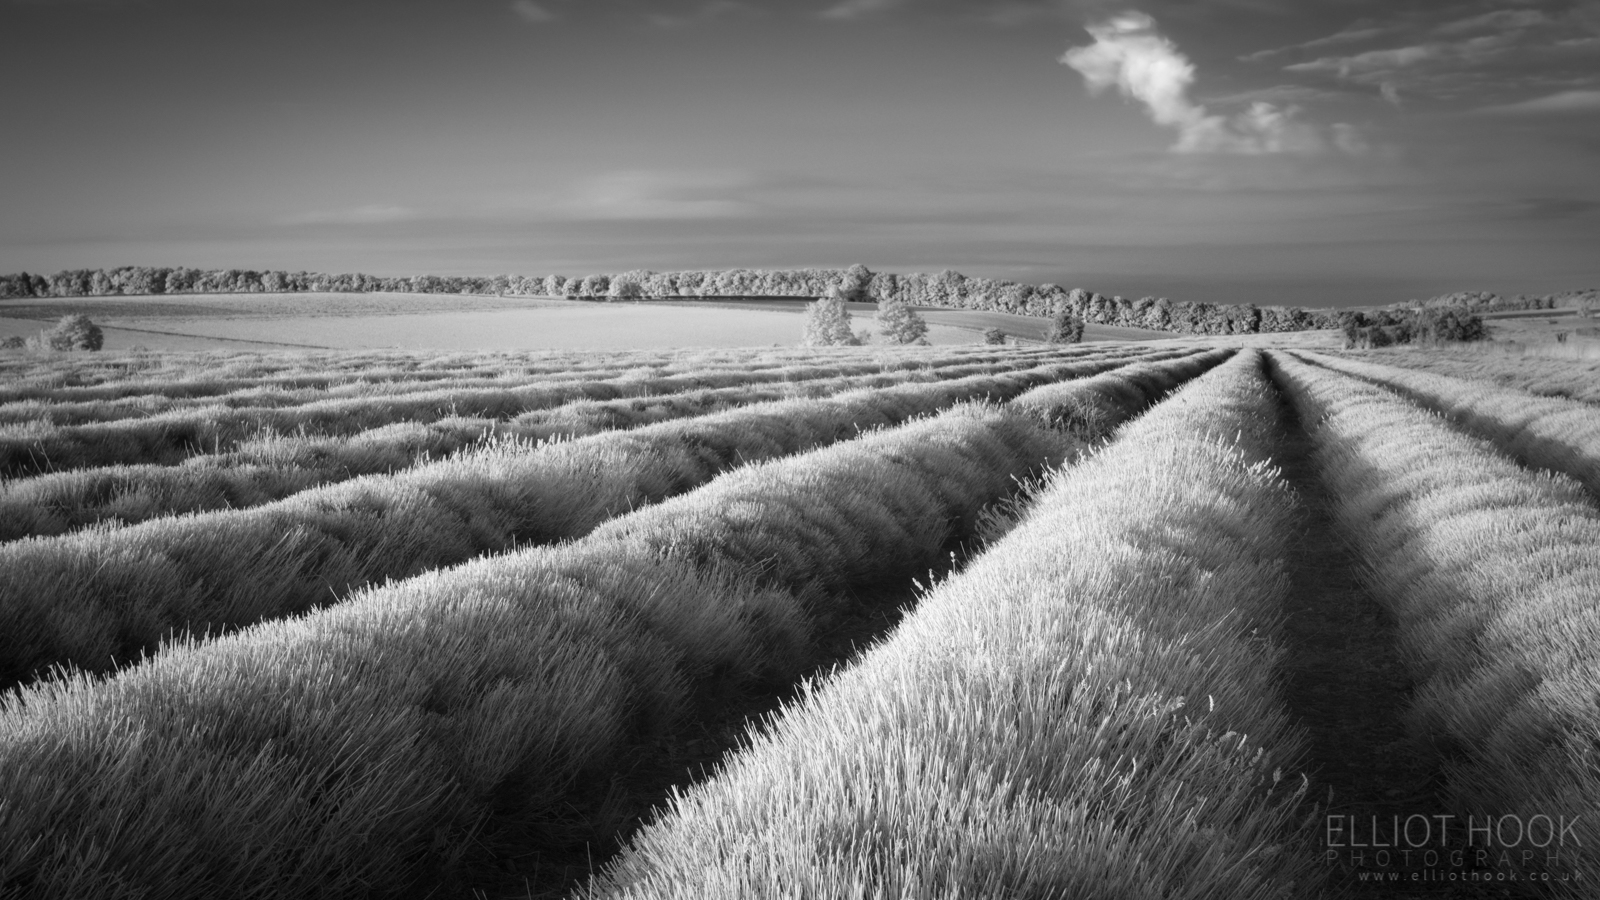
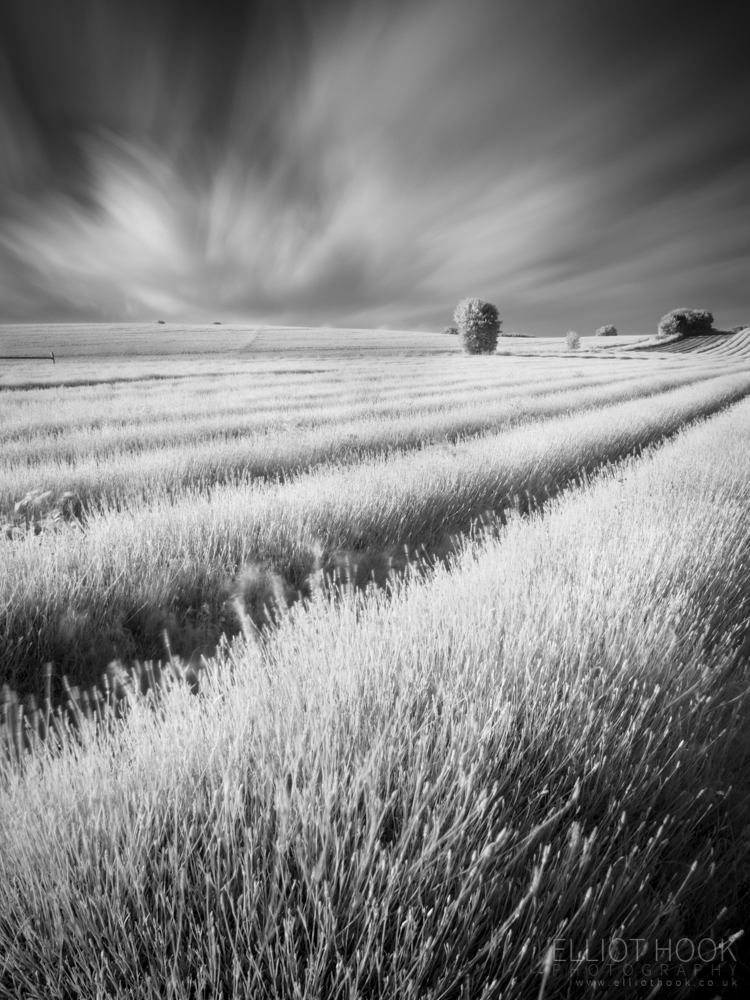
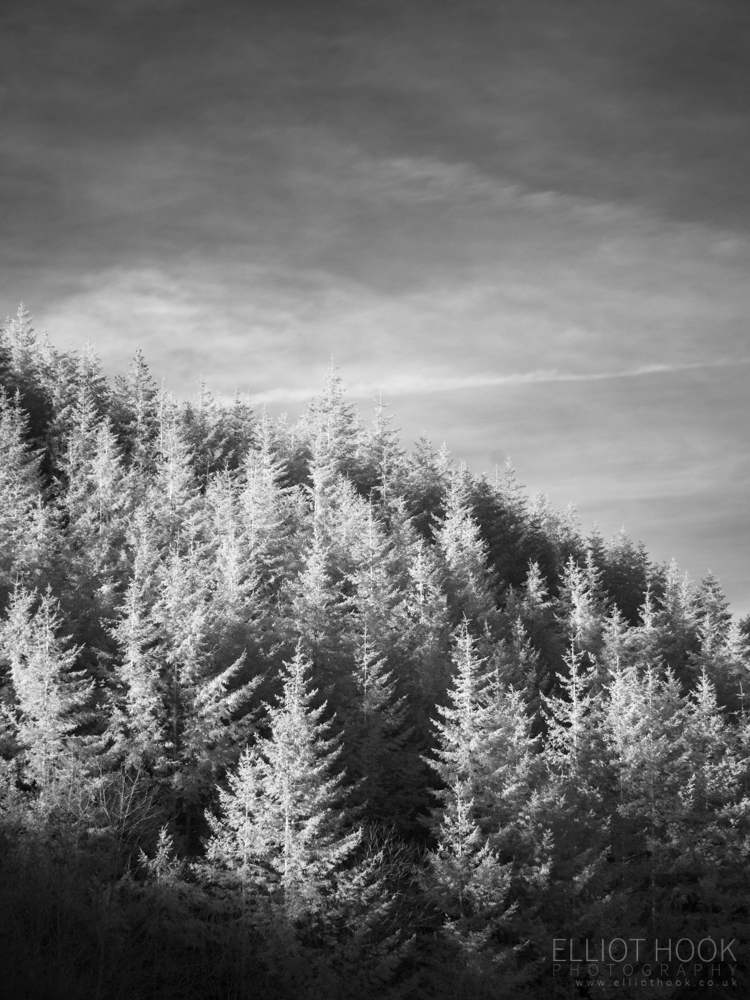
I find myself really drawn to infrared photography. There is something about the naturally high contrast black and white images that IR can produce that just aren’t possible when shooting normally, with the visible spectrum. This is especially true in the landscape where foliage can be rendered bright white and blue skies turn black resulting in images that aren’t necessarily obviously IR to the viewer and will hold the viewer’s attention just that little bit longer.
You can see what I mean by checking out the portfolios of Russ Barnes, Lee Acaster, Matthew Dartford and Justin Minns. I have nothing but admiration for the landscape work by these guys, but I find their IR stuff particularly special. It’s never used as a gimmick, but always to produce intriguing landscape images.
Inspired by this, about 18 months ago I decided to try my hand at IR and picked up a Hoya R72 screw on filter. Now, there was a definite learning curve associated with using IR and I found useful web based resources to be scant, so I thought I would try and put something together here to round up the useful links I’ve used, plus try and share what I’ve learnt along the way.
The Filter
The Hoya R72 IR filter is probably the cheapest/easiest way to experiment with IR photography. It is a screw on filter designed to absorb most of the visible light, transmitting only the infrared light at 720nm.
The small complication with using this filter is that most modern camera sensors have some degree of infrared blocking built in to maximise image quality when shooting the visible spectrum. As such, whilst all sensors are sensitive to IR light, the sensitivity will vary from camera-to-camera.
I’ve used the Hoya R72 with two Nikon bodies – the D7100 and the D800. On the whole, I’d say that the Nikon IR sensitivity is poor – on my D800, it works out to be anywhere from 8-12 stops difference in exposure between images shot with and without the filter. As such, IR photography with the Hoya R72 is comfortably in the realm of ‘long exposures’ when shooting with the latest Nikon bodies (I say that as I believe earlier Nikon bodies don’t have the same degree of IR blocking and can shoot closer to the native exposure). This is fine, it just means that handheld shooting isn’t an option and movement in foliage/clouds is almost inevitable in all but the brightest light. Generally, if I want to shoot at low ISO I find it’s often in the 20-30 second range, usually more.
One thing I have noticed also is that the metering is also less accurate when using this filter. If shooting in aperture priority mode, letting the camera determine the exposure, I find I have to apply around +4 stops exposure compensation to obtain a correctly exposed image. Again, no problem as once you know this is the case, it just becomes part of the workflow.
Lens Hotspots
Lens hotspots are one of the most irritating aspects of shooting infrared and were something I was completely unaware of until I started trying to make IR images. The hotspot appears in the centre of the image, often as an over-exposed, colour-shifted, low contrast circle, or spot. They are an artefact of each individual lens (potentially either reflections from the internal lens coatings or just from the lens elements themselves) and if present, are impossible to overcome. The hotspots typically get worse as you stop down to smaller apertures with the shape of the lens aperture leaves becoming more pronounced in the outline of the spot as it becomes more defined.
The image below was shot at f/7.1 (with the Tokina 12-24mm f/4), and you can see the resulting hot spot in the centre of the image.

Some lenses that exhibit hot spots at ‘typical landscape apertures’ may be passable much wider open (e.g. f/4), but that obviously brings its own complications depending on what you are trying to shoot.
The best resource for researching lens hotspots that I’ve found is this Kolarivision page. The page comes with some disclaimers, but on the whole my experiences align with their assessment of lens performance. It is worth noting that even if a lens appears on their ‘good’ list, if you stop it down far enough, you may well still experience hotspots.
It’s one of those things that is worth checking out and understanding under controlled conditions before you get out in the field. The hot spots can be hard to detect on the back of the camera, and it’s then only once you’re back in front of a computer you realise the images are spoilt. For info, my favourite lens for shooting IR is my 70-200mm f/2.8 VRI. I’ve never seen a hotspot from it, so I feel like I don’t need to worry at all when out shooting.
White Balance
It goes without saying that shooting raw makes a lot of white balance issues trivial, however the processing of IR images involves some manipulation of the white balance during processing, so I find it’s best to start out with the ‘right’ setting in camera. A lot of online resources tell you to point the camera at some foliage and perform a manual white balance calibration (as under IR conditions, they will render as white/neutral) however given the aforementioned sensitivity compromises introduced when shooting IR, this doesn’t necessarily work unless under the brightest of midday suns.
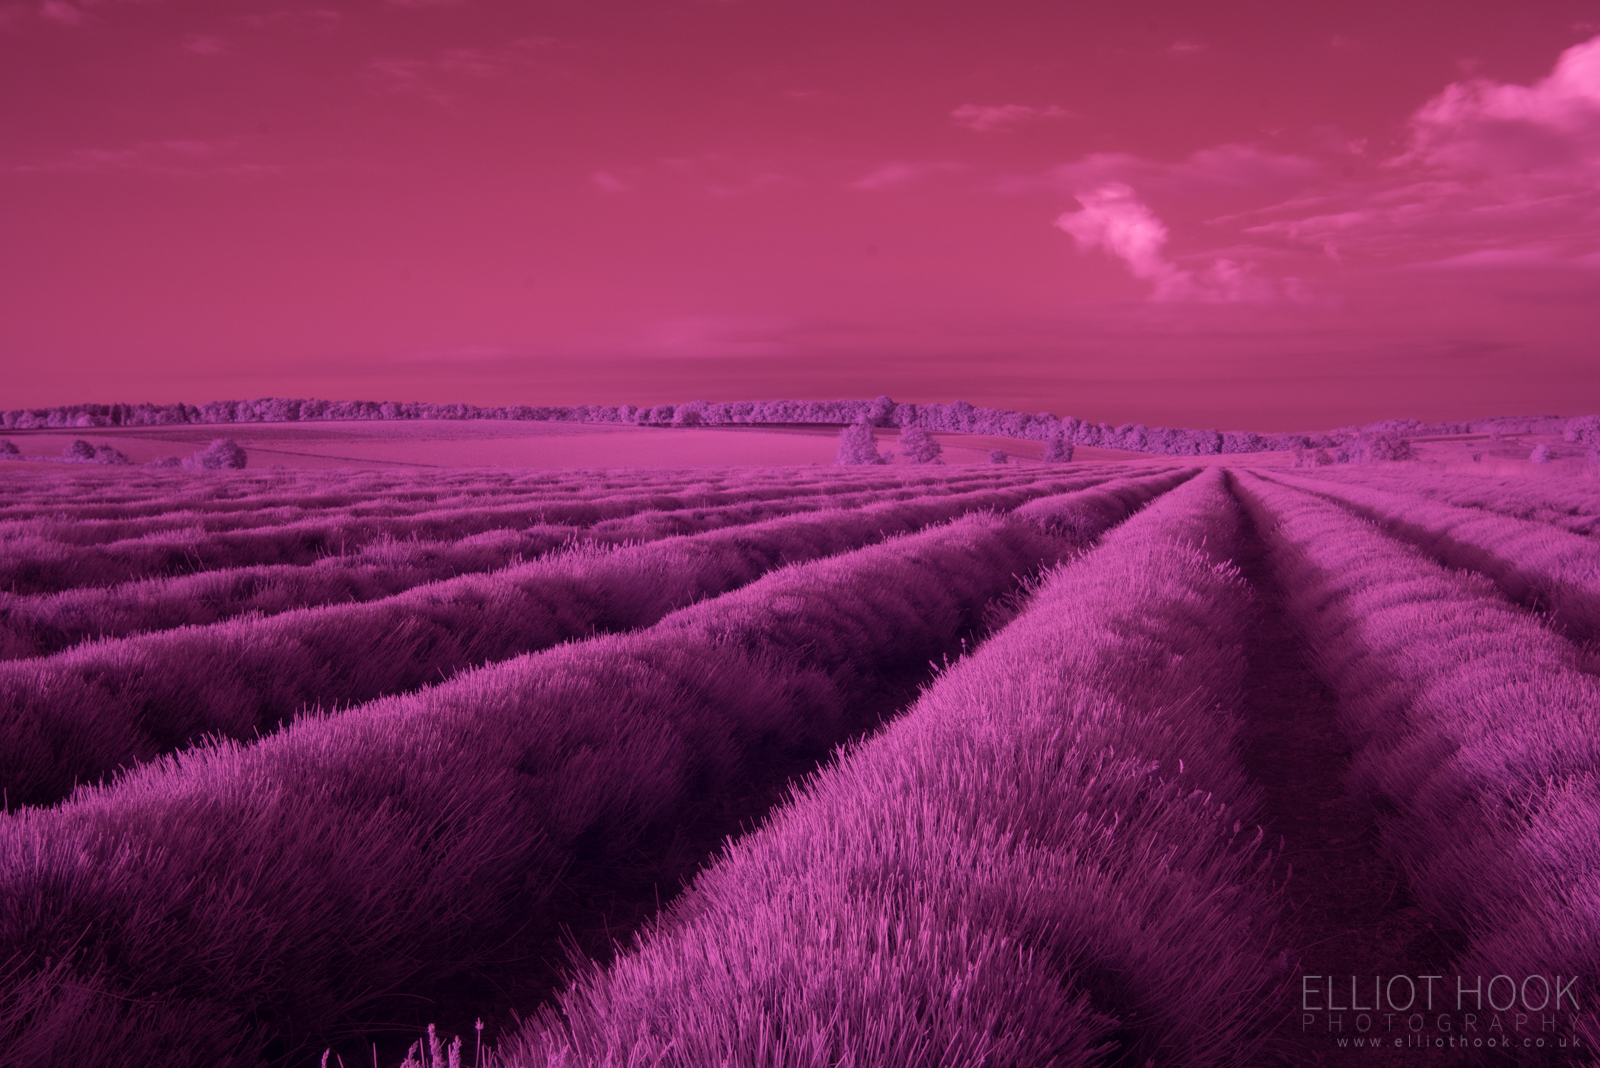
As such, it is best to manually set the white balance to 2500 K. This gives you a raw file that is ready to be processed (I will come on to processing later on.) – typically reddish/purple in colour. The straight-out-of-the-camera version of the header image from this blog post, before processing, is shown below:
Exposure
As previously mentioned, there will be some exposure compensation required to achieve a correctly exposed image and use of the histogram is as valuable as ever for monitoring the exposure of the images. Given the red/purple hues of the images being recorded, I find it wise to monitor the red channel specifically (rather than the default RGB) to ensure that the highlights are not clipped in the red channel, giving data loss of your highlights – if monitoring RBG, the clipped red channel may not be obvious until it is too late.
Workflow
As previously mentioned, the IR sensitivity limitations of Nikon sensors push IR photography firmly into the long exposure realm. As such, I find a similar workflow to my long exposure photography works well.
That is: using a tripod/remote shutter release, composing and focussing without the filter, switching to manual focus (to prevent any focus hunting once the filter is attached), screw on the filter, determine the exposure time for the given ISO (and tweak as appropriate, depending on shutter speed requirements), shoot.
To be continued….
That’s enough for this post, covering the practical aspects of shooting IR. I’ll cover the processing side of things in a follow up post in the new year.
[…] filter, to help others who are just starting out exploring the technique. In this post, and the previous one, I’ve included links to the resources that helped me find my way and I hope they can help […]
[…] filter, to help others who are just starting out exploring the technique. In this post, and the previous one, I’ve included links to the resources that helped me find my way and I hope they can help […]
Really enjoyed your journey, through IR… 90+% of my own work is IR, which I have been doing for 40+ years. I give presentations on the subject to Photographic Societies and clubs, but it is always refreshing to see others IR experiments and successes…
Regards…
I’ve had an r72 filter forever and have never used it. I might give it a whirl around my area to test all this out. Thanks for such a nicely written article!
[…] Hook E (2015). Infrared photography with the Hoya R72 filter, At: https://www.elliothook.co.uk/infrared-photography-with-the-hoya-r72-filter/ (Accessed on 10 February […]