Seceda Sunrise: Behind the Image
28 Apr 2020, Posted by in dolomites, landscapes, post processing, reviewI’m not currently doing much photography so I’ve been getting my landscape fix by watching Alex Nail’s daily image critiques on YouTube. If you haven’t seen Alex’s channel, I highly recommend it – his videos are always high quality, whether made on location or in his office, and are always heavy on content rather than “b-roll” You can count on them to share his thinking behind a particular composition in the field, or decisions being made on the fly during a sunrise or sunset, or to give a self-critical review of images after the fact, again sharing his decision making process about what does and doesn’t work for him.
Anyway, as I enjoy that aspect of his videos so much, I thought I’d do a few ‘behind the image’ blog posts, sharing what drove my thinking at the point of taking the image, and then going through the processing steps to get to the final image.
The first image I’ve chosen is one of my favourite images from a trip to the Dolomites in September 2019, and it’s an image that was challenging to take, as well one that has caused me to spend an atypically large amount of time in both Lightroom and Photoshop to process.
As mentioned in my Dolomites blog posts, Seceda is a well known location that is more than adequately represented on social media. And given our luck with both sunrises and sunsets on this trip, I wasn’t overly confident of (a) getting conditions that would do the location justice, or (b) coming away with anything more than average such an over shot location. So let me walk you through the taking and processing of this image.
Taking the image
As may be obvious from the title, the image was taken at sunrise, but the specific location and composition planning was completed the previous afternoon. There are a number of different viewpoints along the ridge with a good few minutes of walking between them, so working out which viewpoint afforded the best compositions ahead of time and any corresponding foreground compositions (as the scale of the view was dictating a fairly wide angle) was time well spent.
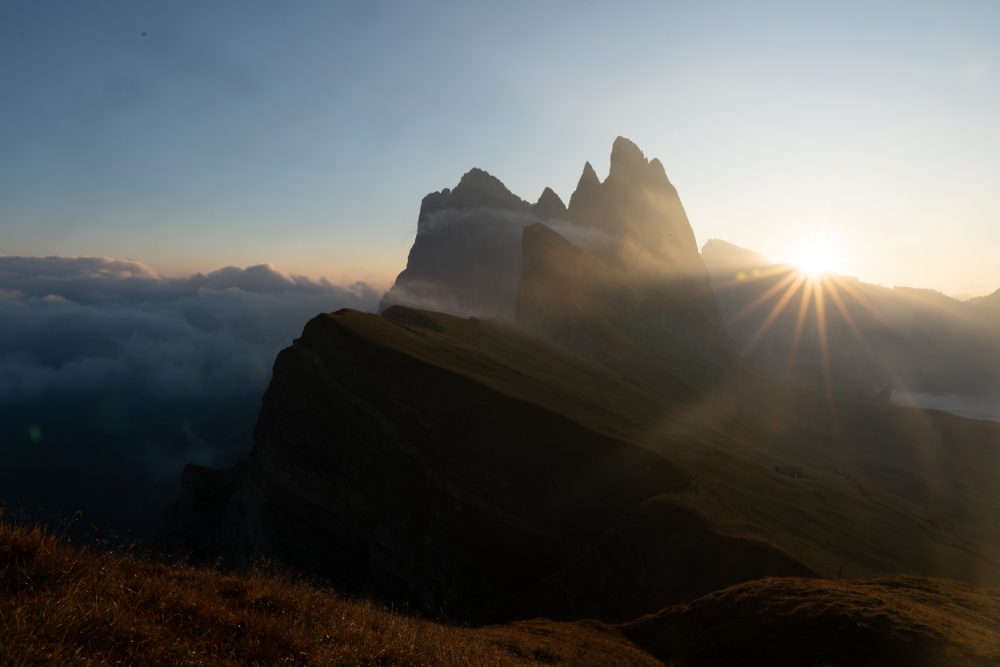
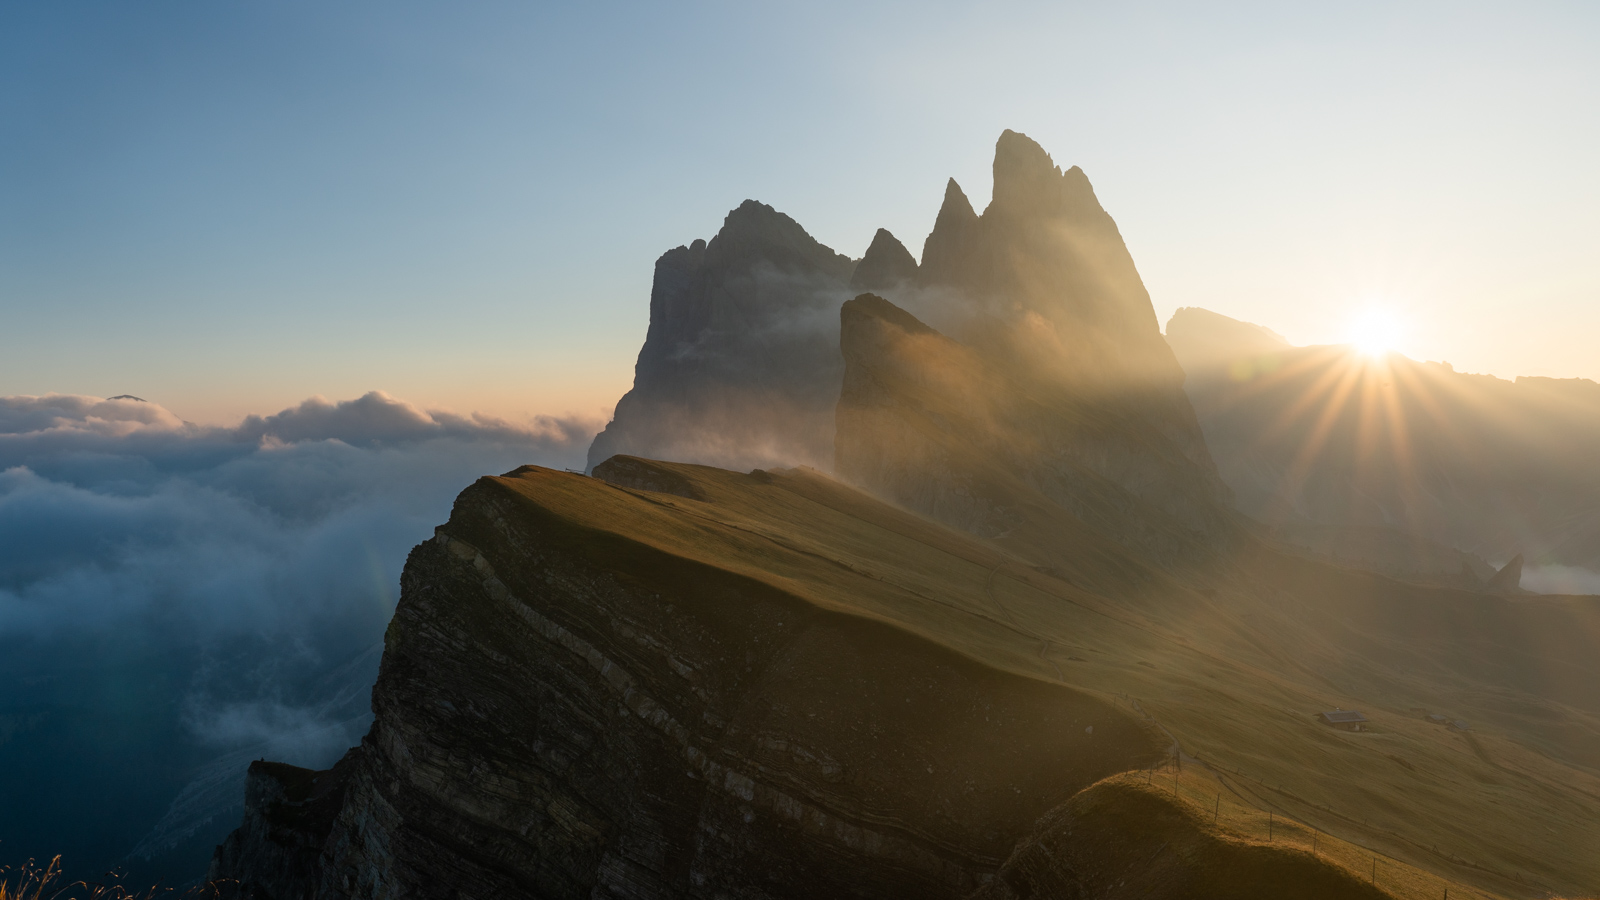
The image straight out of the camera is reproduced below (warts and all) and I want to discuss some of the key points about both the technical aspects and the composition that I think are worth noting.
Composition
Now I generally lean towards a more telephoto focal length by default – part in recognition that I am fairly weak at composing wide foregrounds but also I know that it’s easy to give too much weight to an average foreground and leave the focal point that attracted you to the scene in the first place underrepresented, lost in the bigger picture. However, I intentionally shot this wide, at 26mm, as I was keen to step outside of my comfort zone, intending to make use of foreground detail (we’ll come back to this).
The scene, for me, splits into three fairly balanced vertical strips:
- The right hand side – containing the brightest area within the image, the sun, and it’s sun star as it broke the horizon of the mountains. Undoubtably the main focal point.
- The middle – containing the peaks of the Seceda range and the mid-ground. These are graphic in shape, dark in tone (contrasting with the bright sun near by) and contain some interesting detail of the low cloud around the peaks.
- The left hand side – containing the cloud inversion in the valley below and clear empty sky. A calm counter point to the drama on the middle-right of the frame, offering some negative space to balance things up.
Technical Considerations
The main considerations here were the sun star, glare/lens flare and the exposure – shooting directly into the sun has implications for all of them.
Sun stars are a result of diffraction through non-circular apertures (generally the number of points/spikes you see if equal to the number of aperture blades of the lens being used) and are achieved by shooting straight at the sun. More defined sun stars are achieved at small apertures, e.g. f/22, but that will compromise the sharpness across the rest of the frame. In this case, an aperture of f/11 was still adequate to produce a nice, albeit softer, sun star whilst still giving plenty depth of field, as well as being around the optimum aperture for sharpness for the lens.
Glare and/or lens flare can challenging to control when taking the image and difficult to remove in post-processing. Shooting into the sun will highlight any dirt, dust and marks on your lens (a good reason to avoid using filters if the sun is in the frame as that’s just another layer of glass to cause issues). The flare spots from these marks will typically show as bight circular artefacts, and will be rendered more distinctly at smaller apertures. These can generally be removed by cleaning/wiping the front element. In the image below, you can see the difference in flare spots at f/22 and f/11 as I tested the appearance of the sun star, making me realise I had to clean the front element of the lens.

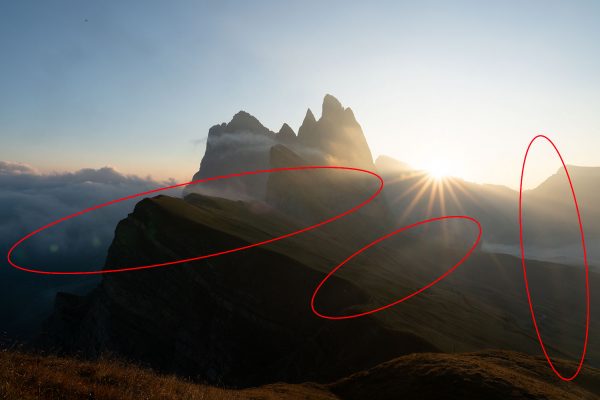
You may also get flare spots resulting from internal reflections from the glass elements inside the lens, often appearing as a series of spots or lines across the frame, originating from the light source, with a green or pink colour cast. You generally have to move the position of the sun in the frame to reduce/remove these, but they may be unavoidable (one trick is to shoot a frame with a finger or thumb blocking out the sun and blend later). In the image below, you can see the appearance of lens flare across the frame, making me recompose to minimise the effect (but, as you’ll see, not eradicate it entirely).
With respect to the exposure, the main aim was to ensure that highlights around the sun were not overexposed. I generally shoot in aperture priority mode and use the on-screen aids offered by my Sony A7RII to ‘shoot for the highlights’, i.e. ensure that the frame is exposed such that the highlights are not blown. Shooting into the sun is always going to be difficult, but I took what looked to the a suitable exposure, and then added a couple of stops of exposure compensation to reduce the exposure further, just to make sure (if I’d have been thinking properly, I would have switched to the exposure bracketing drive mode to automate this process and to give that assurance for each image I took).
Below is a comparison of the two raw files, with the exposure clipping highlights switched on (red areas). As you can see, the sun is clipped in both exposures, but there sky is still well held in the left hand shot, so this is the image I selected for onward processing (again, I could blend the two exposures, but I like to keep things simple, and the highlights were manageable in the single image).
Left: f/11, ISO 100, 26mm, 1/160s. Right: f/11, ISO 100, 26mm, 1/400s

Processing
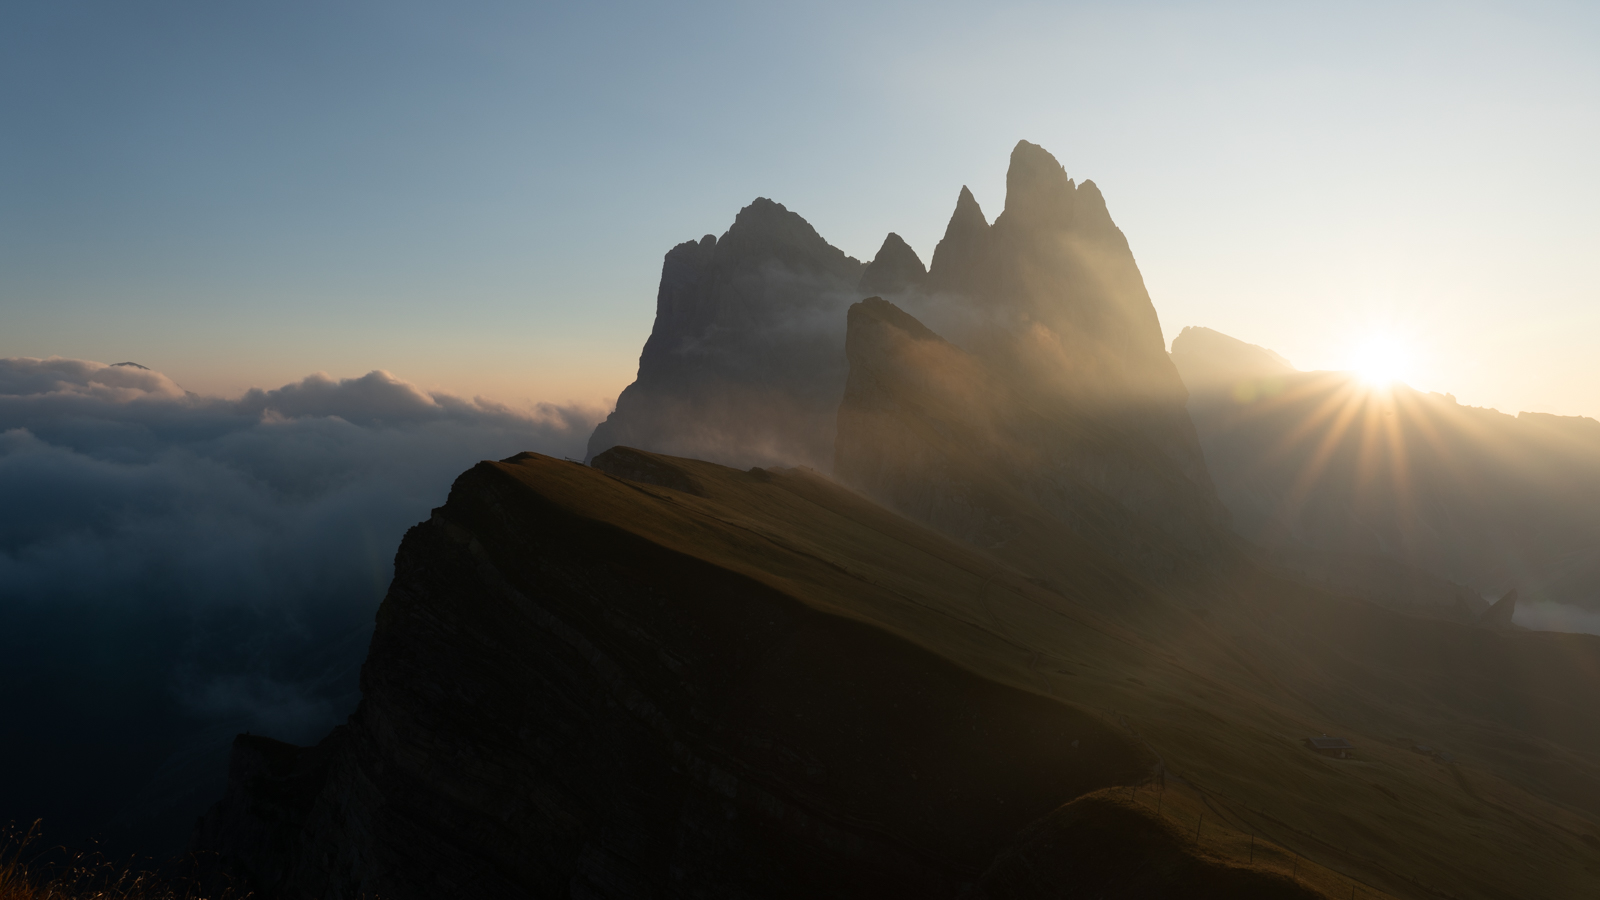
Concerned about the poor composition, the first thing I did was see if I could find a crop that worked. I knew I wanted to get rid of that bottom grassy foreground and balance up the empty sky, i.e. take a sliver of the top and bottom, so a 16:9 aspect ratio was calling out to me. This simplified the composition significantly for me – there was no longer a competing foreground, detracting from the main event, almost giving that more-telephoto feel that I often lean towards.
The only problem, compositionally, at that point was then the ‘horizon’. I’m fairly certain that the camera was level (from my process using my Uniqball tripod head and the on-screen level of the Sony A7RII) however the apparent slope in the clouds on the left hand side of the frame and the upward slope of the mountains on the right hand side of the frame (moving from right to left) all gives the suggestions that the ‘horizon’ isn’t level, so I gave it a small rotation after cropping – you can see the difference below:
The next step for me was to make the broad exposure adjustments using the tools in Lightroom’s ‘basic’ panel. The main adjustments here were to bring the blacks (+8) and shadows (+100) up, the whites (-24) and highlights (-35) down, and then add a boost to the contrast (+58). These adjustments revealed the detail in the dark cliff face and recovered the clipped highlights of the sun whilst still retaining a very natural brightness to the sun:
The exposure adjustment then drew my attention to the lens flare in the mid-bottom-right of the frame, below the sunstar covering the grass and a portion of the cliff face. I set about trying to correct this with the brush tool, creating a mask on which I could adjust the exposure/contrast to try and neutralise the effect of the flare. Giving the before/after like this, the edit is really obvious, but I hope if you came to this image without being told, you wouldn’t know…

There were a couple of other flare artefacts remaining at this point, but I decided to leave those to address in photoshop later on. At this point, the gross edits are done, and now it was onto some finer, detailed, finishing touches. First up, a couple of brush edits, to accenutate some detail in the cliff face and to give a little boost to the highlights on the grassy slope in the middle of the image. Also, a small radial filter covering the sunlit cloud and peaks (just above the grassy slope in the middle of the image) to add a little bit of clarity (+10), to further incease the detail in that fine cloud structure. Difficult to see in the before/after below, such is the subtlty of the edits, but the aim was to gently enhance the image, not overdo it…

I then added a warm split tone to the highlights (hue: 37, saturation: 22, balance: -82) just to add some warmth to the sunrise light. It’s worth saying that I’m a big fan of split tones, and using white balance to set the mood of an image, rather than always going for complete accuracy. Correcting for a true white is challenging in this situation – the clouds on the left of the frame are the only actual white things in the image, but the clouds in shade will be blue in tone, whereas the sunlit cloud will be yellow/orange due to the colour temperature of the sunrise light. And having experimented with different white balances, I decided to leave it as shot (4900K), but inject some warmth to the just highlights with the split tone (controlled by the balance slider of the split tone panel) rather than the whole image if I had used the colour temperature slider. This is most noticeable in the bright sky surroungding the sun on the right hand side of the image…
The only remaining Lightroom correction then was a check of the spot removal tool, before taking the image into photoshop to remove the final few lens flare artefacts (2 spots in the sunstar and a couple of green/blue tinted artefacts in the bottom left of the frame) as well as a couple of features creeping into the edges of the frame from my crop (e.g. the tops of some grasses in the bottom left corner, and the top of a fence post in the bottom right hand corner). This is essentially a polishing step that would be too difficult to do in Lightroom, versus the power of the ‘spot healing’ tools in Photoshop. Focus on the lower half of the left hand third of the image to see the differences…

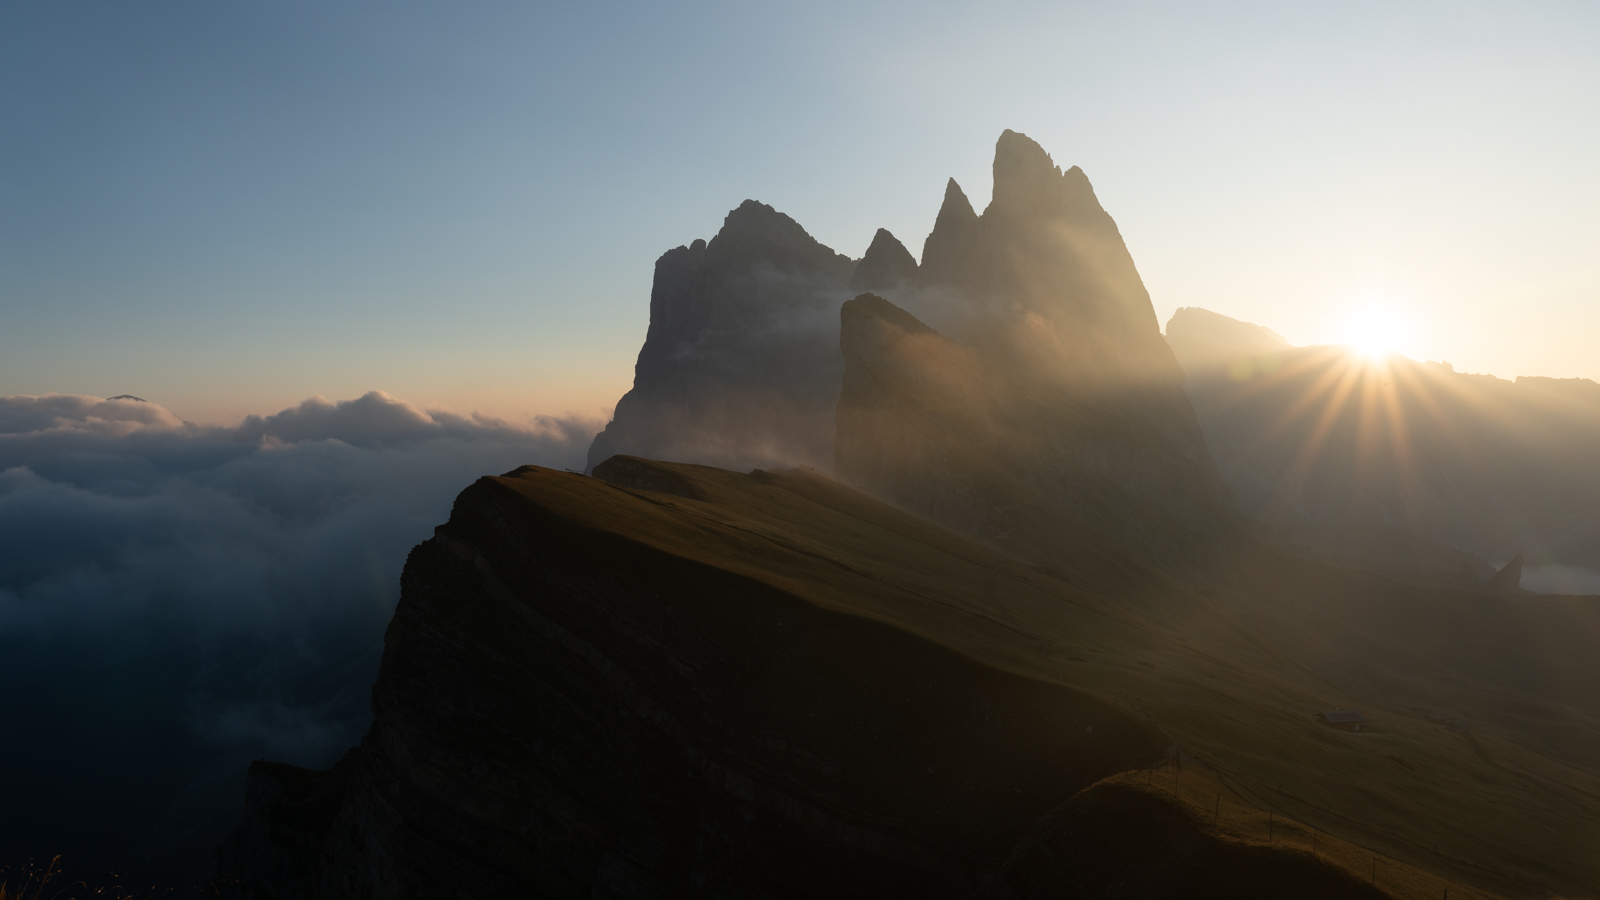
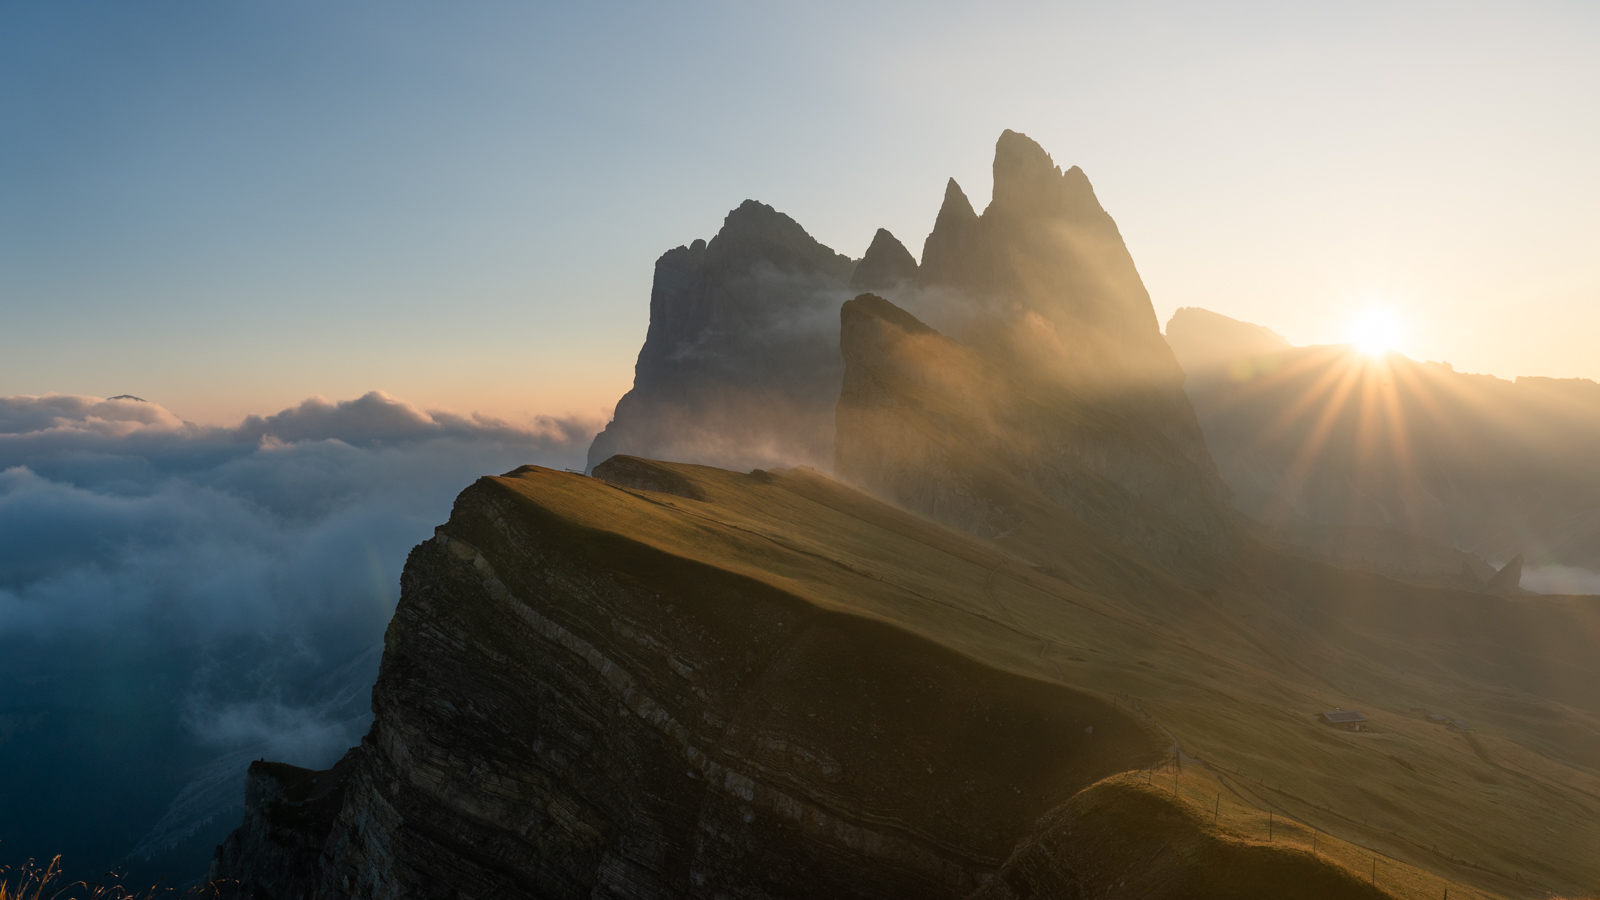
And so that’s it. Here is the final image, versus the raw (in the same crop) to showing the full extent of the processing:
This isn’t the first ‘final’ image I’ve reached with this scene. My initial processing was much darker (as shown in this post), as I love rich contrasts in scenes, but after coming back to the image afresh, I thought it could do with a more naturalistic touch as the orginal edit seemed a little heavy handed. That’s not to say it couldn’t be more natural still, e.g. by removal of the split tone, but I still wanted to convey a certain look/mood in the image and so settled with what you see above.
For now, anyway.