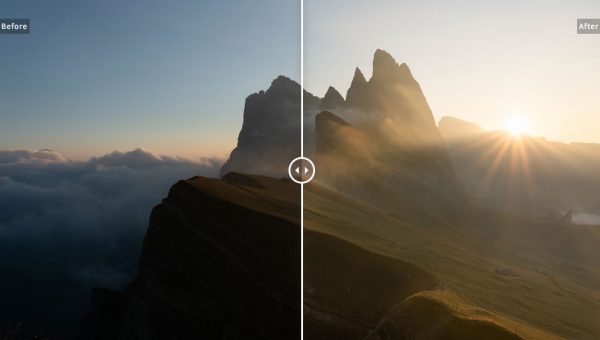
Seceda Sunrise: Behind the Image
28 Apr 2020, Posted by in dolomites, landscapes, post processing, review
I’m not currently doing much photography so I’ve been getting my landscape fix by watching Alex Nail’s daily image critiques on YouTube. If you haven’t seen Alex’s channel, I highly recommend it – his videos are always high quality, whether made on location or in…